
Installing an RV inverter and automatic transfer switch
The DC side (battery, fuse, cables) is where most DIYers do the work. The 120V AC side, including the transfer switch and panel wiring, should be done or checked by a licensed electrician. Never let two AC sources feed the panel at once.
Recommended tools & parts for this job

Batteries & inverters
Pure sine wave inverter
Runs 120V devices from your batteries with clean power for electronics and appliances.
Check price on Amazon.caConverters & chargers
Inverter/charger with built-in transfer switch
Combines an inverter, a multi-stage charger and automatic switching between shore and battery power.
Check price on Amazon.ca
Batteries & inverters
Automatic transfer switch (RV, 30A or 50A)
Automatically selects shore power, generator or inverter. Installation is 120V work, so hire a licensed electrician if unsure.
Check price on Amazon.ca
Batteries & inverters
ANL or Class-T fuse and holder
Main battery protection. Size to your inverter and cable per the manual.
Check price on Amazon.ca
Batteries & inverters
Battery cable set (correct gauge)
Undersized cables waste power and get hot. Match gauge to current and run length.
Check price on Amazon.ca
Electrical & testing
Battery lug and ring terminal kit
For battery, shunt and bus bar connections. Match the stud size and wire gauge.
Check price on Amazon.ca
Batteries & inverters
Battery disconnect switch
Stops parasitic drains during storage, the most common cause of dead batteries in spring.
Check price on Amazon.ca
Electrical & testing
Digital multimeter (auto-ranging, with DC amps)
The single most useful RV diagnostic tool: checks battery voltage, fuses, switches, continuity and 120V outlets.
Check price on Amazon.caElectrical & testing
Clamp meter (AC/DC current)
Measures current draw without breaking the circuit, handy for converter, solar and A/C checks.
Check price on Amazon.caAs an Amazon Associate I earn from qualifying purchases. Always confirm part numbers and sizes against your RV or appliance model before ordering. See all recommended RV tools & parts →
Inverter, inverter/charger and transfer switch
- An inverter turns 12V DC battery power into 120V AC.
- An inverter/charger adds a battery charger and usually a built-in transfer relay. When shore power or a generator is present, it passes that power through and charges the battery. When it's not, it inverts.
- An automatic transfer switch (ATS) selects between two AC sources (for example, shore/generator and inverter) so only one feeds the RV at a time. Many RVs already have a transfer switch for the generator.
Danger: 120V AC can kill. Inverters can produce 120V even when the RV is unplugged, and incorrect wiring can back-feed shore power or create shock hazards on the RV body. Have a licensed electrician do or inspect all 120V AC wiring, including the transfer switch and panel connections. Follow the inverter and ATS manuals exactly. RVs sold in Canada are generally built to the CSA Z240 RV standard, and modifications should keep the rig compliant.
Step 1: Choose the inverter
Size it from your planning work (Planning an RV solar system for Alberta: energy audit, panels, batteries and controller): continuous watts for loads that run together, plus surge for motors and compressors. Choose a pure sine wave model for electronics and appliances. For most RVs, an inverter/charger gives the cleanest integration.
Step 2: Decide what it will power
Options, from simplest to most involved:
- Plug-in only: loads plug directly into outlets on the inverter. No AC wiring changes.
- Selected outlets: the inverter feeds a few outlets or a small sub-panel through a transfer switch.
- Whole RV: the inverter/charger or ATS feeds the main panel.
With options 2 and 3, prevent the inverter from powering big loads it can't handle: the converter/charger (which would try to charge the battery from the inverter, wasting energy in a loop), an electric water heater element, air conditioners and electric heaters. A common approach is to move loads that should be inverter-powered to a separate sub-panel.
Step 3: Pick the location
- As close to the battery as practical, to keep DC cables short.
- Dry, ventilated, and with the clearances the manual specifies.
- Not in the same sealed compartment as flooded lead-acid batteries.
- Accessible for the remote panel, reset buttons and fans.
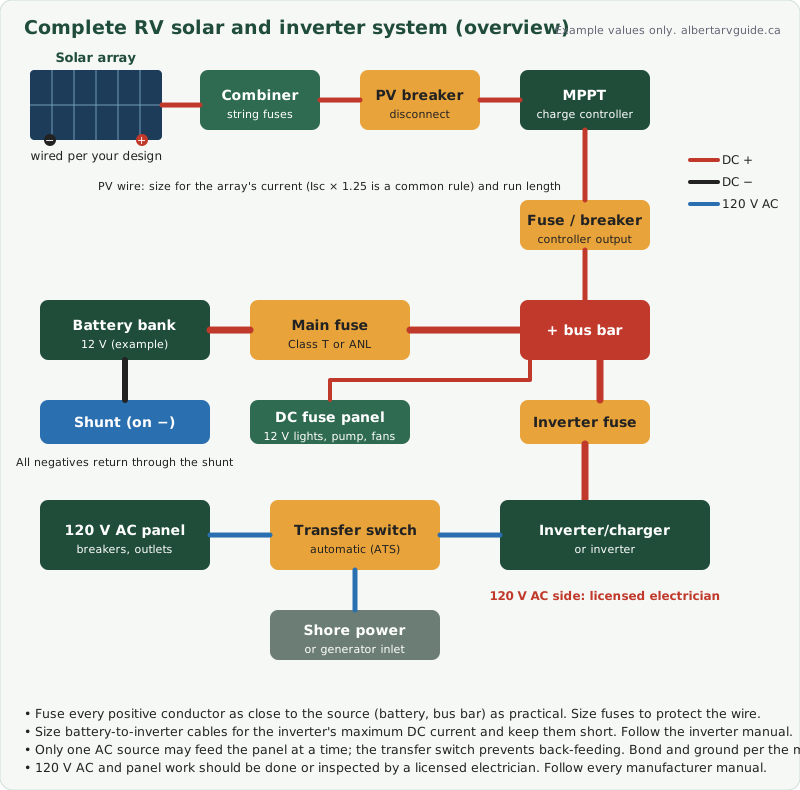
Step 4: DC side: battery, fuse and cables
- Turn off all chargers and disconnect the battery negative.
- Install a main fuse close to the battery positive. Many inverter manuals specify a Class T or ANL fuse of a particular size. Lithium banks can deliver very high fault currents, which is why Class T fuses (with a high interrupt rating) are often recommended.
- Add a battery disconnect switch if the manual calls for one.
- Run positive and negative cables of the gauge the manual specifies for your cable length. Keep the positive and negative cables together.
- Crimp lugs with the correct tool, add heat-shrink, and torque connections to spec.
- Connect the inverter's chassis/ground lug to the RV's chassis ground as the manual describes.
- Reconnect the battery negative last. Expect a small spark as the inverter's capacitors charge. Some manuals describe a pre-charge step.
Step 5: AC side (licensed electrician)
The electrician will:
- Wire the ATS so shore power or a generator takes priority, and the inverter feeds only the intended circuits.
- Make sure the inverter's neutral-to-ground bonding is handled correctly. Many inverters bond neutral to ground while inverting and remove the bond when passing shore power through. Wrong bonding can create shock hazards or trip GFCIs.
- Size breakers and wiring for the inverter's AC output and pass-through current.
- Test GFCI protection and polarity.
Step 6: Test
- With shore power unplugged, turn the inverter on and confirm that the intended outlets work and others don't.
- Plug into shore power and confirm the transfer happens and the inverter/charger switches to charging (if equipped).
- Use a clamp meter to check DC current under load, and feel connections for heat after a sustained load.
- Set the charger profile for your battery chemistry.
When to call a pro
Any time 120V AC wiring, the main panel, or the RV's original transfer switch is involved, hire a licensed electrician. If your RV is under warranty, check with the manufacturer or dealer first.
Related guides
How-to videos
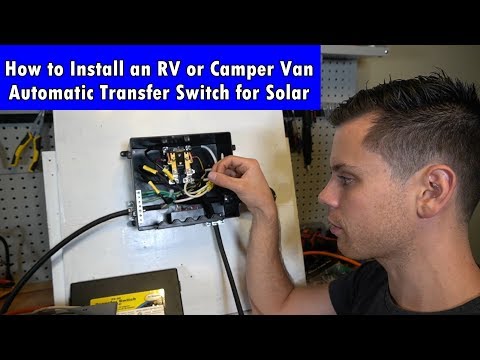

Videos are made by third-party creators and load from youtube-nocookie.com only when you press play. Models differ, so always follow your own manuals and the safety notes on this page.
Disclaimer: This guide is general information based on common RV designs. Models differ, so check your owner's manual and appliance manuals. Propane, 120V electrical and brake systems can cause serious injury if handled incorrectly. If you are unsure, stop and book a certified RV technician.