
How to de-winterize your RV in spring: flush, sanitize and system checks
Spring start-up is your chance to catch winter damage before it ruins a trip. Flush out the antifreeze, sanitize the water system, check every appliance and seal, and do a short shakedown trip close to home.
Recommended tools & parts for this job

Plumbing & water
Adjustable water pressure regulator with gauge
Protects RV plumbing from high campground or city water pressure.
Check price on Amazon.ca
Plumbing & water
Inline water pump strainer
Catches debris before it reaches the pump's check valves.
Check price on Amazon.ca
Propane & heating
Gas leak detection solution
Spray onto propane fittings: bubbles mean a leak.
Check price on Amazon.ca
Safety & detectors
RV propane / CO combo alarm (12V)
Replace alarms at the end of their rated life. Check the date on the label.
Check price on Amazon.ca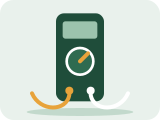
Electrical & testing
Digital multimeter (auto-ranging, with DC amps)
The single most useful RV diagnostic tool: checks battery voltage, fuses, switches, continuity and 120V outlets.
Check price on Amazon.caTires & TPMS
Dial tire pressure gauge (high-pressure range)
RV tires often run at higher pressures than car gauges read well.
Check price on Amazon.ca
Slide-outs & awnings
Rubber seal conditioner
Keeps slide and door seals supple, especially in dry Alberta air.
Check price on Amazon.caAs an Amazon Associate I earn from qualifying purchases. Always confirm part numbers and sizes against your RV or appliance model before ordering. See all recommended RV tools & parts →
When to de-winterize in Alberta
In the Calgary area, a warm stretch in March or April can be followed by snow and hard frost, sometimes well into May. Before you put water back in the lines, check the forecast. If overnight lows are still dipping well below zero and the RV is outside, you may want to wait, or be ready to drain the lines again. Print the de-winterizing checklist to work through the steps below.
Safety: Wear gloves and eye protection when handling bleach solutions, and never mix bleach with other cleaners. Ventilate the RV. When you first use propane after storage, check for leaks before lighting appliances (see RV propane problems: smells, weak flames, regulator issues and leak testing). Test your propane and CO alarms.
Step 1: Exterior walk-around first
Before you touch the plumbing, look for winter damage:
- Roof: cracked vents, torn membrane, hail damage, damaged sealant. See RV roof leak: how to find the source and fix it properly.
- Underbelly: sagging coroplast or torn underbelly (a sign of rodents or water).
- Tires: pressure, cracks, and age. See RV tire care: how to prevent blowouts with correct pressure, load and age checks.
- Signs of rodents inside compartments.
- Water stains inside, especially around windows, vents and slides.
Step 2: Batteries
Reinstall or reconnect batteries. Check the voltage, clean terminals and confirm the converter charges them (see RV battery not charging: how to troubleshoot the converter and 12V system). Test the 12V lights, fans and propane detector.
Step 3: Reinstall the water heater plug or anode
Fit the drain plug or a new anode (if your steel tank needs one) with appropriate thread sealant per the manufacturer. Leave the water heater bypass in bypass for now. You'll flush antifreeze from the lines first.
Step 4: Flush the antifreeze
- Set the pump's winterizing valve back to draw from the fresh tank (a common thing to forget).
- Close all low-point drains.
- Add fresh water to the tank, or connect city water through a pressure regulator.
- Open each faucet (hot and cold) one at a time and run until the water is clear and no longer pink or foamy. Include the shower, outdoor shower and toilet.
- Dump the holding tanks afterward, since antifreeze has drained into them.
Step 5: Sanitize the fresh water system
Sanitizing kills bacteria that grew over the winter. A widely used approach uses unscented household bleach. Follow your RV manufacturer's procedure if it provides one, because recommended concentrations and contact times vary. The general process is:
- Drain the fresh tank.
- Mix the recommended amount of unscented household bleach with water in a container (don't pour neat bleach straight into the tank), and add it to the fresh tank.
- Fill the tank with fresh water.
- Run each faucet until you smell chlorine, then close it.
- Let the system sit for the time your manufacturer recommends (often several hours).
- Drain the tank and flush with fresh water until the chlorine smell is gone. This may take several fills.
Take the water heater out of bypass after sanitizing and flushing, so heavily chlorinated water doesn't sit in the tank, or include it per your manual's instructions.
Step 6: Fill the water heater
- Set bypass valves back to normal.
- Open a hot faucet and run water until the flow is steady with no air sputtering. The tank is full.
- Only then turn on the electric element or gas. Running the element on an empty tank will destroy it. See RV water heater not working: no hot water on gas or electric.
Step 7: Check for leaks
With the pump on and all taps closed, listen. The pump should stop and stay off. If it cycles, there's a leak. Check under sinks, behind the toilet, around the water heater, low-point drains and inside the basement or underbelly. Freeze damage most often shows up at the pump head, faucet cartridges, toilet valve, outdoor shower valves and PEX fittings. See RV water pump not working: how to find the problem and fix it. Clean the pump strainer while you're there.
Step 8: Propane system and appliances
- Remove any vent covers you installed for winter.
- Check vents for nests (wasps and birds love furnace, water heater and fridge vents).
- Open the propane tank valve slowly.
- Check accessible fittings with leak detection solution.
- Light the stove first to purge air from the lines.
- Test the furnace (RV furnace won't ignite: fan runs but no heat, clicking, or lockout), water heater on gas, and the fridge on gas and electric (RV fridge not cooling: absorption and 12V compressor fridge troubleshooting).
- Test the propane/CO alarm, smoke alarm and fire extinguisher gauge.
Step 9: Electrical and A/C
Plug in through your surge protector. Test GFCIs, outlets and the microwave. Run the A/C briefly (outside temperatures permitting) after cleaning filters. See RV air conditioner not cooling: what to check before calling for service.
Step 10: Slides, awning, jacks and seals
- Operate slides and inspect seals. Condition them with a seal conditioner.
- Open and inspect the awning fabric for mould and tears.
- Test leveling jacks and stabilizers.
Step 11: Chassis and running gear
- Check trailer lights, brakes and the breakaway battery (Travel trailer brakes not working: electric brakes, controller and breakaway checks).
- Check tire pressure cold and torque lug nuts per spec.
- Motorhomes: check fluids, belts and the generator (run it under load), and have engine and chassis maintenance done per the chassis manual.
Step 12: Shakedown trip
Before a big trip into the mountains, spend a night somewhere close to home, even in your driveway or a nearby campground. You'll find the little problems while help and parts are close. Then check Spring RV road-trip prep for Alberta: the complete shake-down checklist for the full Alberta spring prep list.
When to call a pro
Leaks inside walls, cracked water heater tanks, propane leaks, appliance faults that won't clear, or roof damage beyond a simple reseal.
How-to videos


Videos are made by third-party creators and load from youtube-nocookie.com only when you press play. Models differ, so always follow your own manuals and the safety notes on this page.
Disclaimer: This guide is general information based on common RV designs. Models differ, so check your owner's manual and appliance manuals. Propane, 120V electrical and brake systems can cause serious injury if handled incorrectly. If you are unsure, stop and book a certified RV technician.