
RV air conditioner not cooling: what to check before calling for service
Rooftop RV air conditioners are rugged, but they're sensitive to voltage, dirty filters and dirty coils. Cleaning and a power check fix a large share of "broken" A/C units.
Recommended tools & parts for this job

Furnace, A/C & vents
AC condenser fin comb
Straightens bent fins to restore airflow.
Check price on Amazon.ca
Furnace, A/C & vents
No-rinse AC coil cleaner
Cleans evaporator and condenser coils.
Check price on Amazon.ca
Essential tool kit
Infrared (non-contact) thermometer
Checks fridge fins, furnace ducts, hubs and tires for abnormal temperatures.
Check price on Amazon.ca
Electrical & testing
30A / 50A RV surge protector or EMS
Protects your RV from bad campground pedestals, miswired outlets and voltage swings.
Check price on Amazon.ca
Electrical & testing
Digital multimeter (auto-ranging, with DC amps)
The single most useful RV diagnostic tool: checks battery voltage, fuses, switches, continuity and 120V outlets.
Check price on Amazon.caAs an Amazon Associate I earn from qualifying purchases. Always confirm part numbers and sizes against your RV or appliance model before ordering. See all recommended RV tools & parts →
How a rooftop RV A/C works
A rooftop unit has a sealed refrigerant system with a compressor, a condenser coil and fan on the outside (rear) half, and an evaporator coil and blower on the inside half. Air from the RV passes through a filter in the ceiling assembly, over the cold evaporator coil and back into the room. A thermostat (wall or ceiling) controls it.
Danger: Rooftop A/C units contain 120V wiring and capacitors that can hold a dangerous charge even when unplugged. Don't open electrical covers unless you're trained to discharge capacitors safely. The refrigerant system is sealed, and in Canada, work involving refrigerants must be done by certified technicians. Roof access is a fall risk. See the safety notes in RV roof leak: how to find the source and fix it properly.
Step 1: Power and thermostat
- Is there 120V? Check shore power, the pedestal breaker, the A/C breaker in the panel and your surge protector or EMS display. A/C units are often the first thing to quit when campground voltage sags on a hot afternoon. See RV outlets not working on shore power: GFCI, breakers and pedestal checks.
- Thermostat: Set to Cool, with the setpoint well below room temperature and the fan on Auto or High. Replace batteries if it uses them. Some thermostats need 12V from the RV battery even on shore power, so check the 12V fuse.
- Compressor delay: Many units wait a few minutes after power-up before starting the compressor. Give it time.
- Generator: Check that it's big enough to start the A/C. Starting surge is much higher than running power.
Step 2: Fan runs but the air is warm
- Filters: Pull the filters from the ceiling assembly and wash or replace them. Clogged filters cut airflow and efficiency.
- Condenser coil: On the roof, with power off, remove the shroud and look at the outside coil. If it's caked in cottonwood fluff, dust or bugs, clean it with a no-rinse coil cleaner or gentle water. Straighten bent fins with a fin comb.
- Is the compressor running? You should hear it and the outside fan running, and feel warm air from the rear of the unit. If the fan runs but the compressor doesn't (or it hums and clicks off), suspect low voltage, a weak start capacitor or a failing compressor. Those are technician jobs.
- Temperature split: Use an infrared or probe thermometer to compare the air going into the return grille with the air coming out of the vents. Many technicians look for a difference of roughly 8 to 11 °C (15 to 20 °F) when conditions are typical. Much less suggests dirty coils, airflow problems or a refrigerant issue.
Step 3: A/C freezes up (ice on the coil)
Ice on the evaporator, or water dripping from the ceiling unit, usually means too little airflow over the cold coil:
- Dirty filters or evaporator coil.
- Fan set to low on a cool night.
- Blocked return air or ducts.
- Running the A/C when it's cool outside.
Turn the A/C to Fan only to melt the ice, then clean filters and coil. If it keeps freezing with clean filters, have a technician check refrigerant charge and the blower.
Step 4: A/C trips the breaker
- Too many loads running at once on 30A service: microwave, water heater element and A/C.
- Low voltage at the pedestal makes motors draw more current.
- A failing compressor or capacitor can draw excessive current at start-up.
- A soft-start device can reduce start-up current, which helps with smaller generators and weak pedestals. Installation involves opening the A/C's electrical box, so use a technician unless you're qualified.
Step 5: Water leaking into the RV
- Rooftop units drain condensate onto the roof through drain channels. Clogged drains overflow inside.
- The foam roof gasket under the A/C compresses over time. If the unit isn't sealing, rain and condensate can enter. Gasket replacement and bolt torque must follow the A/C manufacturer's instructions. Overtightening can crack the base pan.
- Check that the RV is reasonably level so condensate drains as designed.
Maximize A/C performance on hot Alberta days
Alberta summers are usually dry, which helps A/C performance, but strong prairie sun on a dark roof still heats an RV fast. To help your A/C:
- Park with the biggest windows away from afternoon sun, and use shades and reflective window covers.
- Run the A/C early, before the RV heats up. It's easier to keep a cool RV cool than to cool a hot one.
- Close ceiling vents in unused areas to push air where you need it.
- Keep the microwave and stove use to cooler parts of the day.
Annual maintenance
- Clean or replace filters frequently during the cooling season.
- Clean condenser and evaporator coils each spring.
- Inspect the shroud for cracks (hail and UV damage) and replace it if it's brittle.
- Check that the roof gasket isn't leaking.
- At the end of the season, fit an A/C cover only if the manufacturer recommends one, and remove it before running the unit.
When to call a pro
Refrigerant problems, compressor or capacitor failure, burned wiring, or any work inside the electrical box. Note that rooftop units are heavy. Removing one is a two-person job with proper lifting.
How-to videos
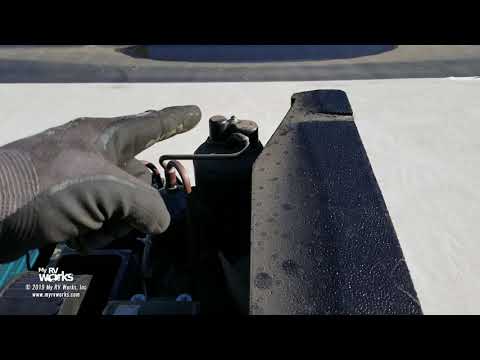

Videos are made by third-party creators and load from youtube-nocookie.com only when you press play. Models differ, so always follow your own manuals and the safety notes on this page.
Disclaimer: This guide is general information based on common RV designs. Models differ, so check your owner's manual and appliance manuals. Propane, 120V electrical and brake systems can cause serious injury if handled incorrectly. If you are unsure, stop and book a certified RV technician.